Yes, you can coat chicken in cornstarch for the air fryer, and it can give you a crisp, golden bite without much fuss. If you pat the chicken dry, season it well, and let the coating set before cooking, you will get better crunch and less mess. The key is to keep the crust light, clingy, and evenly browned, because a few small steps can make a big difference.
Can You Coat Chicken in Corn Starch?
Yes, you can coat chicken in cornstarch, and it often gives you the crisp, light texture people like in air fryer chicken.
For the best results, pat the chicken dry first, then season it well so each piece is evenly flavored.
After that, dredge it in cornstarch, dip it in beaten egg or buttermilk, then coat it again for better adhesion.
A light spray of oil helps the surface crisp instead of looking dry.
In your air fryer, arrange the pieces in a single layer and cook until they’re golden and cooked through.
This method works for wings, thighs, breasts, and tenders, so you can make the meal that suits your table.
Why Corn Starch Makes Chicken Crispy
Cornstarch helps chicken turn crispy because it forms a very thin, dry coating that quickly absorbs surface moisture in the hot air fryer. You get that crackly bite because the tiny particles create a light starchy shell, then brown quickly without absorbing much oil. That means your air fryer chicken tastes lighter and less greasy. When you want extra crunch, you can mix flour and cornstarch, but straight cornstarch gives the sharpest crisp.
| Step | What You See | Result |
|---|---|---|
| Coat | Dusty surface | Less soggy |
| Heat | Hot circulating air | Fast drying |
| Oil | Light spritz | Golden color |
Keep the pieces in a single layer, and the result is crisp, evenly cooked chicken.
Best Chicken Cuts for Air Fryer Fried Chicken
Now that the coating is ready, the next important step is choosing the right chicken cut, because the piece you pick affects crispness, juiciness, and overall cooking time.
Boneless chicken thighs usually give the best results, since their fat helps keep them tender and they cook in about 12 to 18 minutes.
For the crunchiest finish, choose skin-on chicken, because the skin helps the cornstarch coating brown quickly.
Chicken tenders and thin breast fillets also work well if you need a fast meal, but watch them closely so they stay moist.
Bone-in wings, drumsticks, and legs add extra flavor, but they need more time.
Choose pieces that are close in size, and don’t crowd the basket.
Season It Southern-Style
Shake the chicken in a bold Southern-style seasoning mix, and you’ll give that cornstarch coating the flavor it needs to shine.
Mix cornstarch with salt, black pepper, garlic powder, paprika, and a pinch of cayenne, then rub it over dry chicken so every bite feels like home. You can stir in a little flour too if you want extra crispiness and a deeper golden color.
For a cozy, familiar taste, whisk your seasonings into the dry mix before you add any liquid binder. That way, the flavor clings to each piece and doesn’t fade in the air fryer.
When you season this way, your Southern-style chicken tastes bold, balanced, and warmly inviting. It’s the kind of comfort that makes everyone at the table reach for seconds.
Set Up Your Dredging Station
Set out your coating ingredients first so everything stays smooth and organized once you begin. Line up three shallow bowls in order, then pat the chicken dry and keep your tongs, oil spray, and tray close at hand so you can work quickly without making a mess. A little prep here makes the dredging step much easier, and it also helps the coating stick better.
Gather Coating Ingredients
To build a crisp air fryer coating, start by gathering your ingredients into a simple dredging station so each step feels easy instead of messy. You’re setting yourself up for coated chicken that feels homemade and reliable. Measure your cornstarch carefully, then mix it with flour and spices.
- Use a shallow bowl for the dry mix.
- Beat egg or stir buttermilk with hot sauce in another bowl.
- Keep a spray bottle nearby for the air fryer basket finish.
For about 1.5 pounds of chicken, mix 2 to 3 tablespoons cornstarch into your flour blend, or use 2 teaspoons for a simple rub. Add salt, pepper, garlic powder, paprika, and a little cayenne if you like heat. Pat the chicken dry, then let it rest after coating so the crust sticks well.
Arrange Dredging Bowls
Arrange your bowls in a clean left to right line so the coating is easy to manage from the first dip to the last. Place seasoned flour first, then beaten eggs, then your final dry bowl for a double dredge. If you are right handed, this dry wet dry flow keeps your movements smooth and controlled. Leave a little space between bowls so you can shake off extra coating without crowding the station. Set a wire rack nearby for the coated pieces to rest before air frying. That short pause helps the crust adhere better, and your batch stays consistent, not fussy. Keep separate tongs, or swap them between bowls, so each step stays neat. Finish with oil spray close at hand.
| Station step | Why it helps |
|---|---|
| Seasoned flour | Builds the base |
| Beaten eggs | Helps coating cling |
| Final dry bowl | Creates crunch |
| Wire rack rest | Sets the crust |
| Oil spray | Browns evenly |
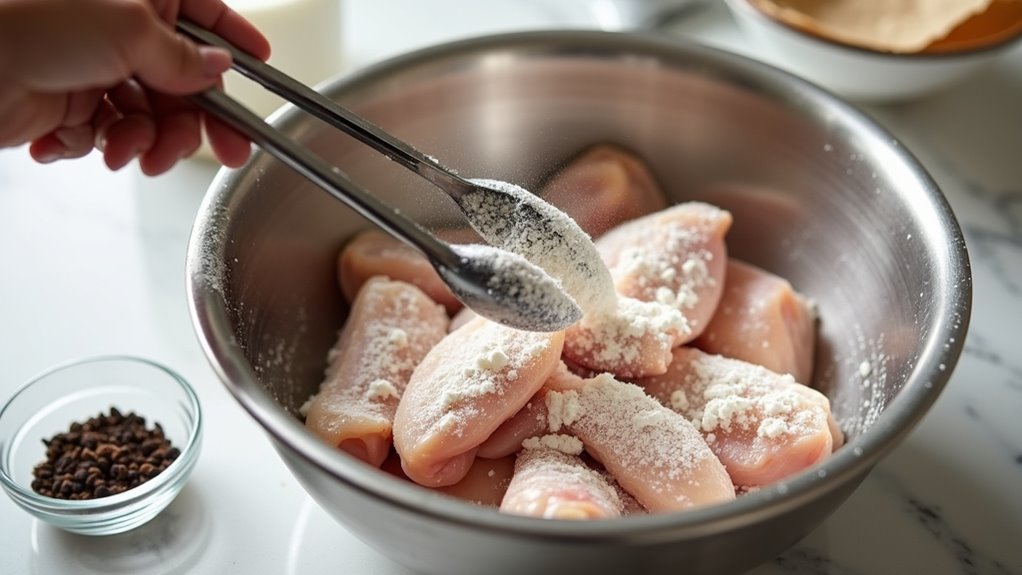
Prep Chicken For Dredging
Dry the chicken well before you add any coating, because a damp surface can turn cornstarch into a sticky mess. Pat the chicken pieces with paper towels, especially if they were frozen, so the coating adheres evenly. Then set up your station so you can move quickly and confidently.
- Lightly season the chicken with salt and pepper.
- Fill one dish with cornstarch, another with egg or buttermilk, and a third with more cornstarch.
- Dredge the chicken in that order, shaking off any excess coating each time.
This simple setup helps you build a crisp crust without clumps or bare spots. After coating each piece, place it on a baking sheet and let it rest for 8 to 10 minutes. That short pause helps everything cling before the air fryer starts.
Coat Chicken for the Crispiest Crust
A crisp crust starts with the coating, and cornstarch is your secret weapon. You can mix cornstarch with flour for a lighter shell, or use it straight when you want extra crunch. Pat the chicken dry first, then coat it well, dip it in egg or buttermilk, and coat it again. That wet dredge, wet rhythm helps each piece cling.
| Step | Why it helps |
|---|---|
| Dry the chicken | Reduces soggy spots |
| Recoat after dipping | Builds a thicker crust |
| Rest 8 to 10 minutes | Lets the coating set |
Once you place it in the air fryer, keep each piece in a single layer. This gives the hot air room to work, so your chicken turns out crispy and juicy, with a crowd pleasing bite everyone loves.
Spray Oil for Even Browning
Now give that cornstarch coating a light oil mist before it goes into the air fryer. This small step helps the crust turn crisp and evenly golden instead of pale in spots. You aren’t trying to soak the coating, just wake it up with a fine oil spray. Use a neutral oil like vegetable, canola, or avocado.
Then keep the chicken in a single layer so each piece has space to brown.
- Give each side about 4 to 6 light pumps.
- Spray the tops before cooking, then spray again after you flip.
- If you want less fuss, brush on a small amount of oil instead.
A refillable sprayer works well, and it also helps keep your basket clean.
Air Fry Chicken at 380°F
Set your air fryer to 380°F and let it do the work.
You’ll get a crisp, golden crust whenever you use cornstarch and give the pieces room to breathe.
Place the coated chicken in a single layer in the air fryer basket, then work in batches if needed so nothing feels crowded.
Before cooking, rest the chicken on a baking sheet for about 10 minutes so the coating sticks better.
Then lightly spray the top with oil for smoother browning and fewer dry spots.
At 380°F, chicken breasts or thighs usually need about 12 to 15 minutes, and thin tenders around 12.
Flip once halfway through.
Check for 165°F inside, then add 1 or 2 minutes if you want more color and crunch.
How Long to Cook Each Piece
You’ll get the best results when you match the cook time to the cut, because thicker or bone-in pieces always need more time than thin breasts or tenders.
Flip the chicken halfway through so the cornstarch coating crisps evenly, then check the thickest part with a meat thermometer.
If the outside still looks pale, give it a short finish in the air fryer until it turns golden and crunchy.
Cook Time By Cut
Different cuts need different air fryer times, so the key is to match the cook time to the thickness of the chicken and whether it has bones.
When you coat chicken with cornstarch, the cut also affects how quickly a crisp crust forms in the air fryer.
Use these guidelines to cook with confidence:
- Boneless tenders or thin breasts, 10 to 12 minutes at 400°F.
- Boneless thighs, 12 to 15 minutes at 380 to 400°F.
- Bone-in pieces, such as drumsticks, breasts, and wings, 20 to 35 minutes, depending on size.
Chicken should reach 165°F.
Bone-in pieces may need a little more time near the bone.
Once you know the cut, you can cook with more confidence and less guesswork.
Flip And Finish
Once the chicken is in the air fryer, flipping it halfway through helps the coating turn evenly crisp on both sides. For most pieces, flip the chicken around the 6 to 8 minute mark, then finish cooking until it is ready. If you are working with tenders or thin fillets, plan on 10 to 12 minutes total. Thicker breasts or bone-in pieces usually need 15 to 20 minutes.
| Cut | Time | Flip |
|---|---|---|
| Tenders | 10 to 12 min | 5 to 6 min |
| Thin fillets | 10 to 12 min | 5 to 6 min |
| Breasts or bone-in | 15 to 20 min | halfway |
After you flip the chicken, mist the exposed side with oil. With flour and cornstarch, that light spray helps the crust turn golden. Check for 165°F. If you batch-cook, re-crisp earlier pieces for 1 to 2 minutes.
Make It Extra Crispy
For the crispiest air fryer chicken, cornstarch does a lot of heavy lifting because it dries into a light, crackly shell that browns quickly and stays crunchy.
If you want extra crispness, build on that base with a few smart steps:
- Pat the chicken dry and coat it evenly.
- Add a pinch of baking powder for a little lift.
- Let it rest for 8 to 10 minutes before it goes into the air fryer.
A light oil spray helps the crust turn golden instead of dry.
Keep the pieces in a single layer with space between them so hot air can circulate properly.
Follow these steps, and your chicken will come out extra crispy with a texture that holds up well.
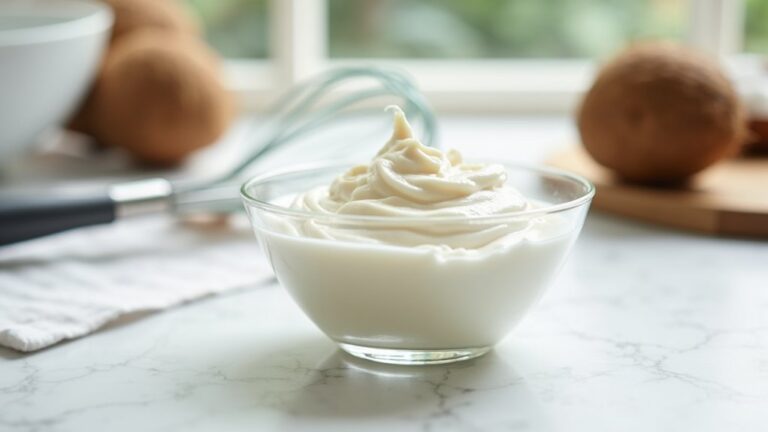
Serve With Buttermilk Ranch Dip
You can make the ranch dip at home by whisking together buttermilk, mayo or sour cream, garlic powder, salt, pepper, and fresh herbs until smooth and chilled.
A sprinkle of chopped dill, parsley, or chives on top adds fresh flavor and makes the plate look bright.
Serve the tangy dip with hot, crispy chicken for a creamy bite that softens the crunch.
Homemade Ranch Dressing
Homemade ranch dressing can turn a simple plate of crispy air fryer chicken into something crave worthy. You can make a cozy buttermilk ranch that feels fresh and familiar, almost like the dip everyone hopes is waiting at the table.
- Whisk 1/2 to 3/4 cup buttermilk with 1/2 to 3/4 cup mayonnaise.
- Stir in 1 to 2 tablespoons chopped herbs, plus garlic powder, onion powder, salt, pepper, and a little lemon juice.
- Chill for 30 minutes, then thin with more buttermilk if you want it pourable.
If you prefer a lighter version, swap in some low fat Greek yogurt.
Keep your ranch in an airtight container in the fridge for 4 to 7 days. Use it within a week so the herbs stay bright and the dip stays welcoming.
Fresh Herb Garnish
A bright handful of fresh herbs can make your buttermilk ranch feel lively and polished, especially next to crispy air fryer chicken. Whenever you whisk mayo, sour cream, buttermilk, garlic powder, onion powder, salt, and pepper, fold in parsley and chives at the end so their color stays vivid. You’ll get a clean, garden fresh taste that feels welcoming and familiar.
| Herb | Texture | Best Use |
|---|---|---|
| Parsley | Sturdy | Brightens ranch |
| Chives | Soft | Adds mild onion hint |
| Dill | Tender | Lifts aroma |
If you prepare the dip ahead, stir in fresh herbs right before serving, or within 1 to 2 hours. For extra charm, save a pinch for the chicken and add a little lemon zest.
Best Dipping Pairings
Fresh herbs in the ranch set the stage for the best dunking partner, because cornstarch-coated air-fried chicken loves a cool, creamy dip with a little zip. When you whisk buttermilk ranch with mayo or sour cream, dill, chives, parsley, garlic powder, onion powder, salt, and pepper, then chill it, you get a dip that coats each crunchy bite and keeps it juicy.
For your spread, try this:
- Add hot sauce or cayenne for a lively kick.
- Keep the ranch cold so it remains smooth.
- Serve celery, pickles, or coleslaw on the side.
That extra tang helps your air fried chicken taste bold without stealing the crisp cornstarch coating. If the dip feels thick, stir in a splash of buttermilk or add lemon wedges nearby for balance.
Fix Common Coating Problems
Should your coating keep clumping, sliding off, or turning patchy, do not worry, you can usually fix it with a few small tweaks. Start by dusting the chicken lightly with cornstarch or a 2:1 flour to cornstarch mix, then shake off the excess so the coating stays crisp in the air fryer. Pat each piece dry, add a thin coat of oil, and let it rest on a rack for 8 to 10 minutes before cooking. That helps the coating stick properly.
| Problem | Fix |
|---|---|
| Clumping | Use less cornstarch |
| Sliding off | Dry chicken well |
| Patchy spots | Coat evenly |
| Soggy crust | Rest on rack |
| Burnt spots | Lower heat 10 to 20°F |
Keep pieces in one layer, flip once, and re-spritz as needed.
Corn Starch Chicken Tips and Variations
For the best cornstarch chicken in the air fryer, start with a dry surface and a simple coating plan. Pat the chicken dry, then use a flour and cornstarch mix, dip it in egg or buttermilk, and coat it again. That double layer helps the crust stick and brown quickly in the air fryer.
- Keep the pieces in a single layer with space between them.
- Spray or brush on a little oil.
- Cook at 375 to 400°F for 12 to 16 minutes, flipping halfway through.
You can season the mix with garlic powder, paprika, or cayenne.
Wings, thighs, breasts, and tenders all work well, so you can match the meal to your group and still get a crisp, satisfying bite.
Frequently Asked Questions
Is Air Frying Ok for Diabetics?
Yes, you can air fry and still keep your blood sugar stable. You will do best with meal planning, medication timing, lean proteins, and modest portions that fit your routine and lifestyle.
How to Cook Chicken for Diabetic Patients?
Cook chicken by choosing lean cuts, using low carb marinades, and adding herb seasoning. Keep portions to 3 to 4 ounces, then air fry until the internal temperature reaches 165°F. This approach supports your dietary goals.
Can I Use Cornstarch in the Air Fryer?
Yes, you can use cornstarch in the air fryer. It can help create a crisp coating and improve texture. You can also try cornstarch alternatives and use smart coating techniques for the best results.
Is Air Frying Good for High Cholesterol?
Yes, air frying can help you manage high cholesterol if you choose lean foods, low sodium alternatives, fiber rich sides, and practice portion control. It can support heart healthy habits by helping you reduce saturated fat.