Introduction to Cake Pop Recipes
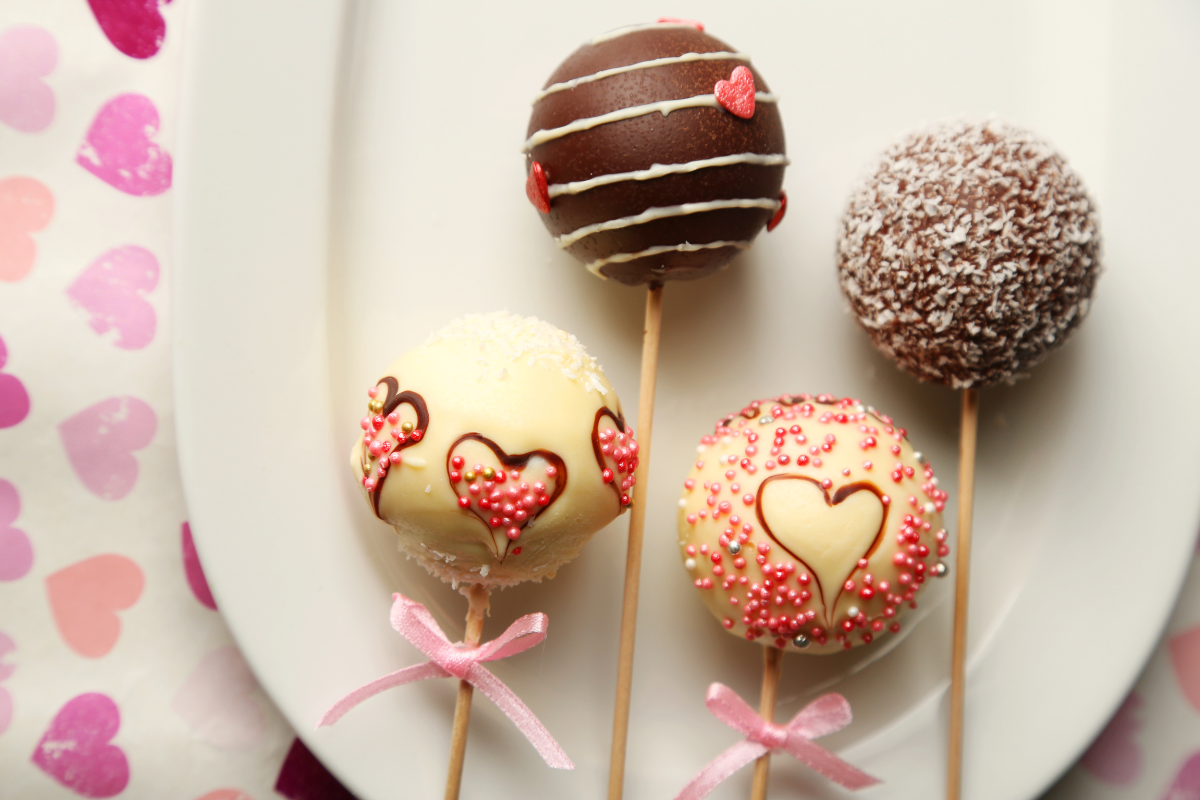
Cake pop recipes represent a delightful culinary trend that merges the joy of cake with the fun of lollipop-style treats. These bite-sized delights have surged in popularity due to their versatility, allowing novice and experienced bakers to unleash their creativity. Adorned with a myriad of decorations, flavors, and coatings, cake pops are suitable for any occasion, ranging from casual gatherings to elegant celebrations.
For those delving into the expansive world of baking, KitchenTastes.com provides a wealth of related content. For example, the Ultimate Guide to Using Canned Spinach in Dips, Recipes, and Tips offers innovative methods to enhance your culinary prowess, akin to the creativity involved in crafting cake pops. Additionally, insights from Soup Maker Recipes: A Comprehensive Guide to Delicious Meals can inspire you to explore new dimensions in your cooking journey, mirroring the inventive spirit of cake pop crafting.
When concocting your cake pop recipes, consider incorporating various designs, easy recipes, gourmet variations, homemade options, and baking tips to elevate your creations. Whether aiming for simplicity, elegance, or whimsical charm in your cake pops, the possibilities are truly endless.

Essential Ingredients for Cake Pops
Creating the perfect cake pop is all about choosing the right ingredients. Each element, from your cake base to the binders and coatings, is key to making delightful treats.
Choosing Your Cake Base
Firstly, pick your cake base. Your options include:
- Vanilla or Chocolate Cake: These classic flavors are favorites for their versatility with various coatings.
- Red Velvet Cake: Opt for red velvet if you’re after a cake that’s as visually appealing as it is tasty, perfect with cream cheese frosting.
- Sponge Cake: A lighter choice, sponge cake can be infused with flavors like lemon or almond extract.
- Boxed Cake Mix: For ease and speed, a boxed mix works well, providing consistent and reliable results.
Binders and Coatings
Next, let’s talk about binders and coatings:
- Frosting: It’s essential for holding the cake crumbs together. You can choose a flavor that complements your cake and theme.
- Jams and Curds: These are great for adding a fruity punch to your pops, offering a sweet and tart balance.
- Coatings: Chocolate or candy melts are perfect for a smooth and enticing finish. Feel free to color and flavor these as you like.
- Decorations: Finally, add some pizzazz with sprinkles, nuts, or a drizzle of chocolate.
By focusing on these ingredients and how they combine, you can create cake pops that are both delicious and eye-catching. Remember to keep your sentences short and sweet, and use transition words to ensure your text flows smoothly, enhancing readability and engagement.
Step-by-Step Cake Pop Recipe
Embarking on your cake pop journey begins with a solid foundation: the cake base. Once you’ve mastered this, you’ll move on to shaping and decorating your cake pops, turning them into festive treats for any occasion.
Preparing the Cake Base
- Choose Your Flavor: Decide whether you want a classic vanilla, rich chocolate, or perhaps a more adventurous cake flavor.
- Baking the Cake: Follow your chosen recipe or box mix instructions to bake the cake. Ensure it’s fully cooked by inserting a toothpick into the center; it should come out clean.
- Cooling: Allow the cake to cool completely. This step is crucial to prevent your cake pops from becoming mushy when mixed with the binder.
- Crumbling: Once cooled, crumble the cake into fine pieces in a large bowl. You can use your hands or a food processor to achieve a consistent texture.
Shaping and Decorating Cake Pops
- Mixing with Binder: Add your chosen binder (frosting, jam, etc.) to the crumbled cake, starting with a small amount and increasing until the mixture is moist enough to hold its shape.
- Forming the Balls: Scoop out the mixture and roll it into balls, ensuring they’re compact and smooth. If the mixture is too dry, add a bit more binder; if too wet, a little more cake crumb.
- Chilling: Place the formed balls on a baking sheet lined with parchment paper and chill in the refrigerator for at least an hour to set.
- Inserting Sticks: Once chilled, dip the tip of your cake pop sticks into melted chocolate or candy melt and insert them halfway into each ball. The coating helps secure the stick inside the cake ball.
- Decorating: Dip each cake pop into your coating of choice, tapping off any excess. Decorate with sprinkles, edible glitter, or any other toppings while the coating is still wet. Stand them upright in a styrofoam block or cake pop stand to dry.
- Theming: For special occasions, consider themed decorations. Use colors that match the event’s theme, or decorate with specific shapes or characters using edible accents.
By following these detailed steps, you’ll create stunning cake pops that are as delicious to eat as they are delightful to look at, perfect for any gathering or just a special treat at home.
Creative Variations of Cake Pops
Diving into the world of cake pops, you’ll find that the possibilities for customization are nearly endless. By experimenting with various flavor combinations and themed decorations, you can tailor your cake pops to any taste preference or celebration.
Flavor Combinations
- Mix-Ins: Consider folding crushed cookies, sprinkles, or even small candy pieces into your cake base mixture for added texture and flavor bursts.
- Infusions: Infuse your cake or binder with extracts like almond, peppermint, or coconut to introduce new flavor dimensions. Citrus zests can also add a fresh, tangy kick.
- Complementary Pairings: Think about flavor pairings that work well together, like chocolate and raspberry, lemon and blueberry, or carrot cake and cream cheese. These can influence both your cake choice and your binders.
- Layered Flavors: Create a surprise center by inserting a small piece of fruit, a dollop of jam, or even a mini chocolate bar into the center of each cake ball before shaping.
Themed Decorations
- Holiday Themes: For Christmas, use red and green sprinkles or shape your cake pops like little Christmas trees. Halloween calls for spooky designs, like ghosts or pumpkins, using colored coatings and decorative elements.
- Event-Specific: For baby showers, weddings, or birthday parties, match the color scheme of the event with your coatings and sprinkles. Monograms, edible glitter, and fondant accents can add a personalized touch.
- Character-Inspired: Kids’ parties offer a chance to get creative with character-themed cake pops. Use fondant, edible paint, or themed sprinkles to create cake pops that resemble popular cartoon or movie characters.
By embracing these creative variations, your cake pops will not only taste delightful but also become a visual centerpiece, sparking joy and conversation at any gathering.
Cake Pop Serving and Presentation Ideas
Once you’ve crafted your cake pops, presenting them in an appealing and accessible way can enhance the overall experience for your guests or gift recipients. Here are some innovative serving and packaging ideas to make your cake pops stand out.
Display and Serving Techniques
- Cake Pop Stands: Utilize cake pop stands to display your creations vertically, making them easy to grab and enjoy. You can find stands in various materials like acrylic, wood, or metal to match your event’s theme.
- Decorative Platters: Arrange your cake pops on a decorative platter or a tiered cake stand. You can use a bed of edible confetti or colored sugar to add an extra pop of color and festivity.
- Edible Arrangements: Mimic the look of a floral bouquet by arranging your cake pops in a vase or pot, using styrofoam to hold them in place. This can serve as a centerpiece and a dessert.
- Individual Serving: For a more personalized touch, serve each cake pop in a small cupcake liner or on a mini plate, especially if they are elaborately decorated or themed.
Packaging Tips
- Clear Bags: Wrap individual cake pops in clear cellophane bags, sealing them with a twist tie or a decorative ribbon. This method showcases the design while keeping the treat fresh.
- Custom Boxes: For gifting or special occasions, custom boxes can add a professional touch. Choose boxes that fit the theme of the event and include a window to display the cake pop.
- Protective Wrapping: If your cake pops have elaborate decorations, ensure the packaging protects them from getting smudged or damaged. Tissue paper or bubble wrap can provide extra cushioning.
- Labeling: Adding labels or tags with flavor descriptions or a personal message can make the cake pops feel more special and tailored to the occasion or individual.
By considering these serving and packaging ideas, you can elevate your cake pops from simple treats to memorable, eye-catching delights that guests and recipients will surely appreciate.
FAQs About Cake Pop Recipes
Making cake pops can be a fun and rewarding baking project, but it comes with its own set of questions, especially for those new to the process. Here are answers to some common queries that can help you achieve cake pop success.
- What is the secret to dipping cake pops?
- The key to smooth dipping is to ensure your coating (typically chocolate or candy melts) is at the right consistency. It should be fluid but not too thin. Using a deep, narrow cup can make the process easier, allowing the cake pop to be submerged fully. Before dipping, let the melted coating cool slightly to avoid melting the cake pop. Also, double-dipping can be a game-changer: dip once, let it set, then dip again for a flawless finish.
- What is the inside of a cake pop made of?
- The core of a cake pop is a mixture of crumbled cake and a binder, usually frosting or cream cheese. This combination is mashed together until it reaches a moldable consistency, then shaped into balls. The type of cake and binder can vary, allowing for a range of flavors and textures. Some bakers use jam, peanut butter, or even liqueur-infused ganache as binders for an extra flavor kick.
- How to make perfect round cake pops?
- Achieving perfectly round cake pops is all about the rolling technique and consistency of your cake mixture. After combining your crumbled cake with the binder, chill the mixture slightly to firm it up. This makes it easier to roll. Use a cookie scoop or a tablespoon to portion the mix, then roll it between your palms to form a smooth, round ball. If the mixture sticks to your hands, dust them with a bit of powdered sugar or cocoa powder (depending on the cake flavor) to prevent sticking. For uniformity, consider using a small scale to weigh each portion before rolling.
By addressing these questions, you can refine your cake pop-making skills, leading to more consistent and professional-looking results. Remember, practice makes perfect, and even the imperfect ones will still taste delicious!
Conclusion
Throughout this comprehensive guide, we’ve delved into the delightful world of cake pops, exploring each step and aspect that contributes to creating these charming treats. From selecting the right ingredients and mastering the cake base to dipping, decorating, and presenting your cake pops, we’ve covered the essential knowledge needed to embark on your cake pop-making journey.
We began by understanding the essential components that form the foundation of a cake pop, emphasizing the importance of choosing the right cake base and binders to ensure a perfect texture and taste. We also explored various coatings and decorations that not only enhance the flavor but also the visual appeal of your cake pops.
Moving forward, we provided a step-by-step guide on preparing the cake base, shaping the cake pops, and ensuring they are dipped to perfection for a smooth and enticing finish. Additionally, we offered creative ideas for flavor combinations and themed decorations, allowing you to customize your cake pops for any occasion or personal preference.
For those seeking further inspiration or guidance, exploring external resources can be incredibly beneficial. Whether you’re a beginner or an experienced baker, these links offer valuable insights and ideas:
- For a solid starting point, try this basic cake pop recipe, which provides a foundational method that you can build upon with your unique twists.
- To elevate your cake pop artistry, explore cake pop decorating ideas, where you’ll find a plethora of designs and techniques to inspire your creations.
- And for those eager to experiment with new and exciting flavors, discover gourmet cake pop flavors, expanding your repertoire and delighting your taste buds.
In conclusion, the art of making cake pops is a journey of creativity and precision, blending baking skills with decorative flair. We encourage you to experiment with different recipes, embrace the process, and most importantly, have fun as you craft these delightful treats. Whether for a special occasion or a sweet everyday indulgence, cake pops offer a world of possibilities waiting to be explored.