
Introduction to Cake Pops
Cake pops have become a dessert favorite, blending the richness of cake with the charm of candy. These treats started as a clever way to use leftover cake. Now, they start at parties, weddings, and bakeries. For further exploration into cake pop mastery, check out Butter Cake Recipe Mastery, where you can delve deeper into understanding cake bases, a crucial aspect of making delightful cake pops.
Making cake pops is straightforward. Mix crumbled cake with frosting, form balls, and dip them in chocolate or candy. This creates a treat with a moist center and a crisp shell. You can decorate them with sprinkles or themes to suit any event. For advanced cake pop decorating tips, consider visiting Master Cake Pop Recipes and Decorating Tips for further insights into cake pop artistry.
People love cake pops for their versatility and fun. They suit any age and can match various tastes or dietary needs. Their easy-to-eat format makes them perfect for any occasion. To explore the breadth of dessert recipes available, including cake pops, check out Heavenly Hash Brownies Recipe to discover dessert variety.
Bakers keep innovating with cake pop designs. They range from simple elegance to intricate details. This creativity keeps cake pops popular on social media and in baking circles. They remain a staple in the dessert world, showing the blend of tradition and innovation.
The Basics of Cake Pop-Making
To embark on your cake pop-making journey, understanding the essential ingredients and tools is crucial. This foundation sets the stage for successful and delicious cake pops.
Ingredients and Tools Needed
At the heart of cake pop creation are the cake and frosting. You can either bake a cake from scratch or use a store-bought one. The cake’s flavor can vary based on your preference or theme. For frosting, a simple buttercream or cream cheese frosting works well, providing the necessary moisture and binding.
Choosing the Right Cake and Frosting
Selecting the right cake and frosting is vital for the perfect cake pop texture. A denser cake, like a pound cake, holds up better for forming pops. The frosting should not be too runny or too stiff. It must be just enough to moisten the cake crumbs and help them bind together without becoming soggy.
Essential Tools for Dipping
Once you have your cake ball ready, the next step is dipping. For this, you’ll need:
- Melting Chocolate or Candy Melts: Choose a high-quality product for a smooth, even coating.
- Double Boiler or Microwave: For melting your chocolate or candy melts. Ensure a smooth, lump-free consistency.
- Cake Pop Sticks: These serve as the handles for your cake pops, making them easier to dip and decorate.
- Styrofoam Block or Cake Pop Stand: To hold the pops upright as they dry and set.
- Spoons or Dipping Tools: These help in evenly coating the cake pops with chocolate or candy.
By gathering the right ingredients and tools, you’re set to create cake pops that not only look professional but also taste delightful. The joy of making cake pops lies in the process, allowing for creativity and personalization at every step.
Preparing Your Cake Pops for Dipping
Mastering cake pop preparation is key to ensuring they hold up well during dipping and present beautifully. Achieving the perfect consistency, cooling, shaping, and understanding the importance of temperature are all critical steps.
Achieving the Perfect Consistency
The foundation of a great cake pop is its consistency. After crumbling your cake, mix it with just enough frosting to make it pliable, similar to play dough. The mixture should not be too moist or crumbly; it should hold together when shaped without oozing frosting. This balance ensures that your cake pops will stay on the stick during dipping and not fall apart.
Cooling and Shaping
Once you’ve mixed your cake and frosting to the right consistency, it’s time to shape the mixture into balls. Use a scoop or spoon to portion the mix, then roll it between your hands to form smooth, even balls. Place these on a baking sheet lined with parchment paper.
After shaping, cooling is crucial. Chill the cake balls in the refrigerator for at least an hour or in the freezer for about 15-20 minutes. This step firms them up and makes them easier to dip without falling apart.
The Importance of Temperature
Temperature plays a vital role in preparing cake pops for dipping. The cake balls should be cold enough to stay firm during dipping, but the coating should be warm and fluid. If the cake balls are too warm, they may fall off the stick when dipped; if the coating is too hot, it can cause the cake to expand and crack the surface.
Before dipping, remove the cake balls from the refrigerator or freezer and let them sit at room temperature for a few minutes to prevent cracking. Simultaneously, ensure your coating is melted to a smooth consistency, not too hot but fluid enough for easy dipping. This careful attention to temperature will help you achieve a smooth, professional finish on your cake pops.
The Dipping Process
Dipping cake pops is an art that gives them their signature look and taste. The right coating, melting technique, and dipping method are essential for a flawless finish.
Choosing Your Coating
Selecting the appropriate coating for your cake pops is crucial. You can choose between chocolate (dark, milk, or white) and candy melts. Chocolate offers a rich, authentic flavor but requires tempering to achieve a glossy finish and a crisp texture when set. Candy melts are easier to work with and come in various colors, but they might not taste as rich as real chocolate.
When choosing chocolate, opt for high-quality brands that melt smoothly and taste great. If you prefer candy melts, select a reputable brand to ensure a smooth finish and vibrant colors.
Melting Your Chocolate or Candy Coats
Melting your coating correctly is vital for the dipping process. For chocolate, use a double boiler or microwave in short bursts, stirring frequently to avoid scorching. If you’re using a microwave, heat the chocolate in 30-second intervals, stirring in between until it’s fully melted and smooth.
For candy melts, follow the manufacturer’s instructions. Typically, you can melt them in a microwave or over a double boiler, similar to chocolate. Ensure the coating is smooth and fluid without being too runny.
Techniques for a Smooth Dip
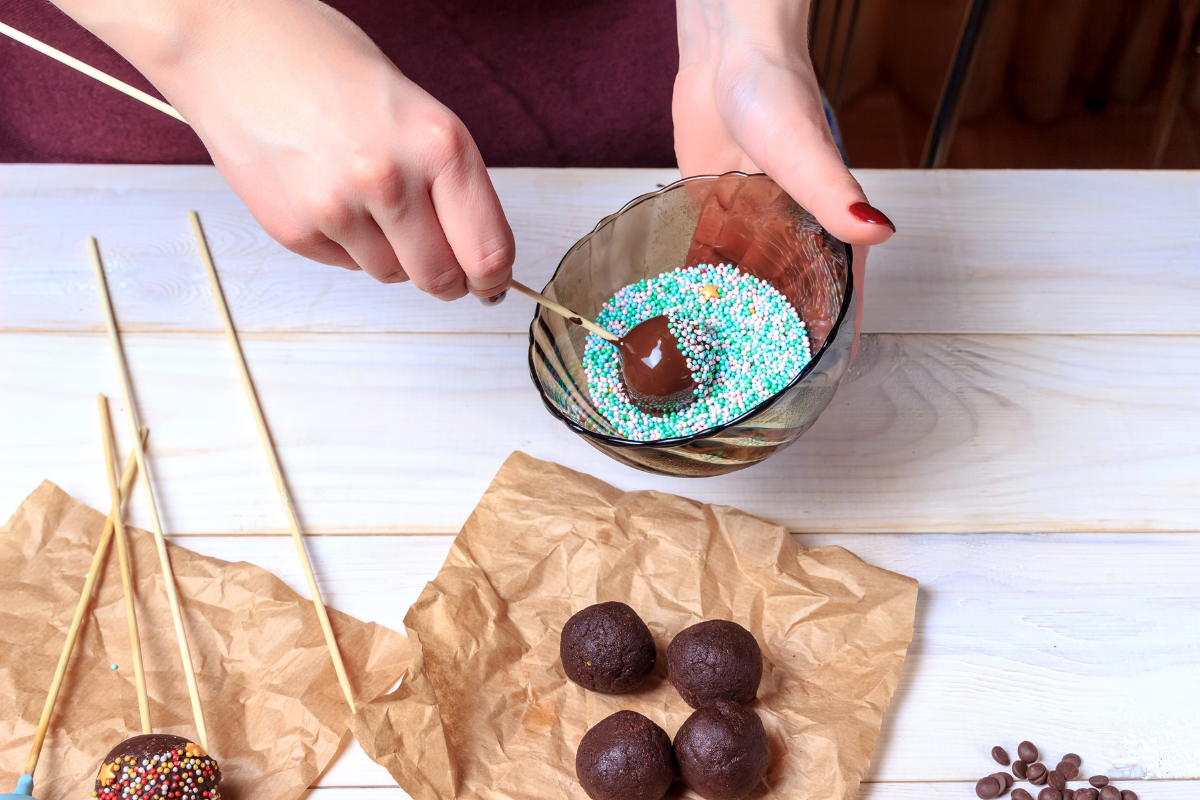
- Preparation: Before dipping, ensure your cake balls are chilled and firm. Insert the tip of the cake pop stick into the melted coating before inserting it into the cake ball. This step helps secure the ball to the stick.
- Dipping: Gently dip the cake ball into the coating, ensuring it’s completely covered. Avoid stirring or swirling, as this can cause the cake ball to fall off the stick.
- Removing Excess: After dipping, gently tap the stick on the edge of your melting pot or bowl to remove excess coating. Rotate the pop slowly to ensure an even coat and prevent drips.
- Decorating: If you plan to add sprinkles or other decorations, do so while the coating is still wet. This way, they will adhere properly.
- Setting: Place the dipped cake pops upright in a stand or a piece of styrofoam to set. If the coating starts to pool at the base while drying, you can gently wipe away the excess with a toothpick.
By following these steps and paying attention to the quality of your ingredients and the temperature of your components, you can achieve beautifully dipped cake pops with a smooth, professional finish.
Troubleshooting Common Issues
Creating cake pops can sometimes present challenges, but knowing how to address common issues will enhance your results. Let’s explore how to prevent and fix cracks, bumps, and uneven coatings, ensuring your cake pops are both delicious and visually appealing.
Avoiding Cracks and Bumps
Temperature discrepancies often cause cracks. Allowing your chilled cake balls to adjust to room temperature before dipping can prevent this issue. Moreover, your coating should be warm and fluid, not hot, to avoid shocking the cold cake balls and causing cracks.
To prevent bumps, ensure your cake is crumbled finely and mixed well with the frosting. If bumps appear, you can smooth them out by rolling the balls gently between your hands before chilling.
Ensuring Even Coating
For a uniform coating, the consistency of your chocolate or candy melts is key. It should coat the cake pop smoothly without being overly runny or too thick. Adjust the coating’s temperature or thin it slightly with paramount crystals or vegetable oil if necessary.
Dip the cake pop in one fluid motion to avoid uneven layers. Tapping off excess coating gently ensures a smooth finish without drips.
Fixing Imperfections
If imperfections arise after the coating sets, you can often correct them with a bit of finesse. For minor cracks or holes, a small amount of melted coating applied with a toothpick can mend the issue. Larger flaws might require a second dip or can be camouflaged with decorative elements.
Addressing bumps or rough textures can sometimes be done by gently scraping the area with a knife or covering it with decorations, such as sprinkles or a contrasting drizzle.
By incorporating these strategies, you can enhance the appearance and quality of your cake pops, making them a delightful treat for any occasion.
Decorating and Presenting Cake Pops
Once you’ve mastered the basics of making cake pops, the next exciting step is decoration and presentation. With a bit of creativity and attention to detail, you can transform your cake pops into eye-catching treats that are sure to impress.
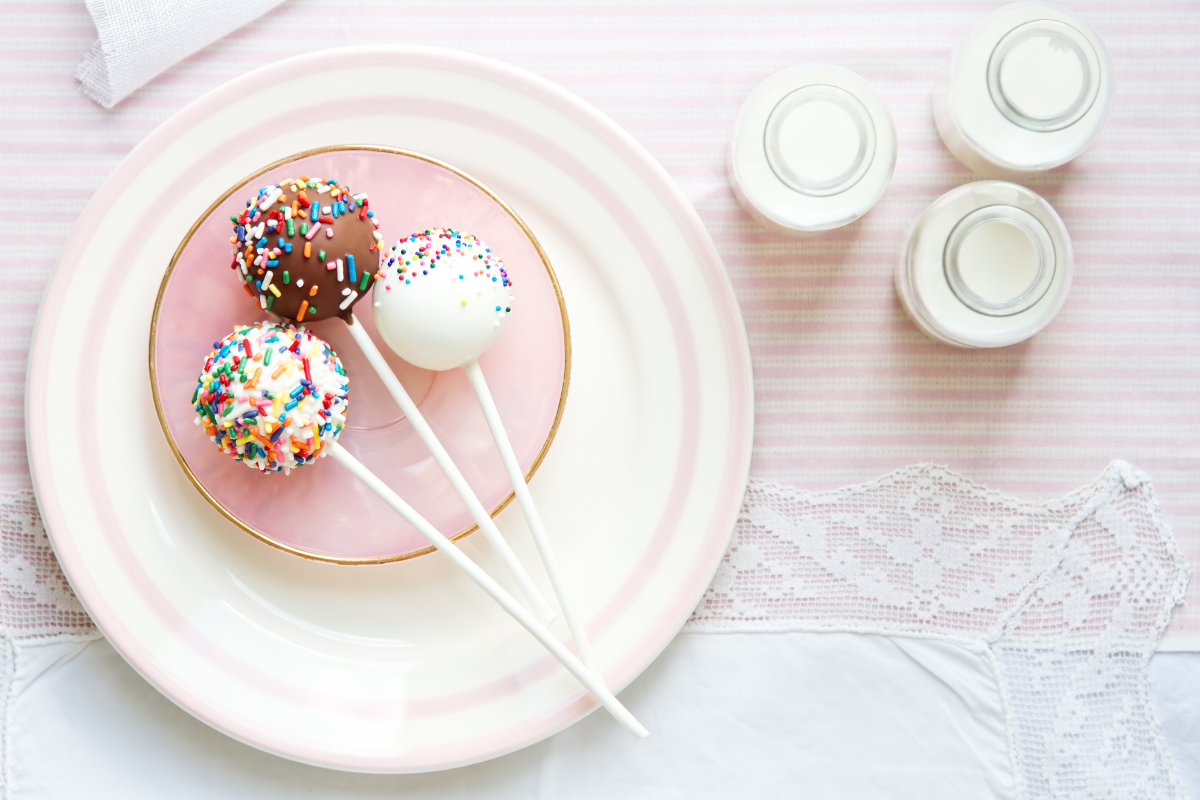
Creative Decoration Ideas
The possibilities for decorating cake pops are nearly endless. You can dip them in different colors of coatings, use a variety of sprinkles, or even create themed designs to match an event or season. For a more elegant look, consider using metallic edible paint or dust to add a touch of glamour. If you’re aiming for fun and whimsical, colorful sprinkles, sugar pearls, or shaped confetti can make your cake pops stand out.
Adding Finishing Touches
Once the base coating has set, adding finishing touches can elevate your cake pops to the next level. Drizzling them with a contrasting color of chocolate or candy melts adds both flavor and visual appeal. You can also apply edible decorations like flowers, characters, or initials using a little extra coating as glue. For a festive touch, tie a small ribbon bow at the base of each stick.
Presentation Tips
How you present your cake pops can be just as important as how they taste. Displaying them on a stand or in a decorated vase can make them the centerpiece of your table. If you’re giving them as gifts, individual wrapping in clear cellophane tied with a ribbon offers a personal touch. For events, consider creating a cake pop bouquet or arranging them in patterns or shapes on a platter.
Remember, the key to successful cake pop decoration and presentation is to have fun and let your creativity shine. With these tips, your cake pops will not only taste delicious but also look stunning, making them a memorable treat for any occasion.

Advanced Tips and Tricks
Elevating your cake pop skills involves mastering a few professional techniques and understanding the nuances of flavor and storage. These advanced tips can help you create cake pops that are a cut above the standard fare.
Professional Techniques
To achieve a truly professional finish, consider tempering your chocolate for dipping. Tempered chocolate sets up crisp and shiny, giving your cake pops a gourmet look. Additionally, using a candy thermometer can help you maintain the perfect temperature for your coatings, preventing issues like bloom or separation.
Flavor Combinations
Experimenting with flavor combinations can set your cake pops apart. Think beyond the classic vanilla or chocolate cake and try incorporating unique flavors like lemon-lavender, matcha, or even spicy chocolate. Infusing your frosting with extracts, zests, or liqueurs can add an unexpected twist that delights the palate.
Storage Advice
Proper storage is key to maintaining the quality of your cake pops. Store them in a cool, dry place away from direct sunlight. If you need to refrigerate them, wrap them tightly to prevent condensation, which can make the coating sticky or cause it to crack. For longer storage, cake pops can be frozen, but ensure they are well-protected from freezer burn.
By applying these advanced techniques and tips, you can enhance the sophistication of your cake pops, making them not only delicious but also a showcase of your baking artistry.
FAQs Section
Here are some frequently asked questions based on common queries people have about making cake pops, providing additional insights and helpful information.
- How do you prevent cake pops from falling off the stick? To prevent cake pops from falling off the stick, make sure the cake ball is firm and not too moist. Dip the tip of the stick in a little coating before inserting it into the cake ball. Chill the formed balls before dipping to ensure they are firm.
- Can you use any type of cake for cake pops? Yes, you can use any type of cake for cake pops. However, denser cakes tend to work better as they hold together more effectively when mixed with frosting and formed into balls.
- Why do my cake pops crack after dipping? Cracking usually occurs if there is a significant temperature difference between the cake balls and the coating. To prevent this, avoid dipping very cold cake balls into too warm coating. Let the chilled cake balls warm up slightly and ensure the coating is not too hot.
- How long do cake pops last? Cake pops can last up to a week when stored properly in a cool, dry place. If refrigerated, they can last up to two weeks. For longer storage, they can be frozen for several months.
- Can cake pops be made in advance? Yes, cake pops can be made in advance. They can be stored in the refrigerator for up to two weeks or frozen for a few months. Just ensure they are wrapped or stored in an airtight container to maintain freshness.
- How do you get a smooth finish on cake pops? For a smooth finish, ensure your coating is at the right temperature and consistency. Dip the cake pop in one smooth motion and tap off any excess coating. Use a stand to let them dry upright, and avoid touching them until the coating has set completely.
Conclusion
Making cake pops is an enjoyable and creative baking endeavor that combines the artistry of decoration with the science of baking. By mastering the steps from mixing the right consistency of cake and frosting to achieving a smooth, even coating, you can create stunning cake pops that are as delightful to look at as they are to eat. Experiment with different chocolate coating techniques, maintain the ideal cake pop consistency, explore creative designs, and choose the best frosting to complement your cake base. Remember, temperature control is crucial in every phase of cake pop-making.
We encourage you to try your hand at making cake pops and experimenting with the tips and techniques shared. Whether you’re a novice baker or looking to refine your skills, cake pops offer a versatile canvas for your culinary creativity.
For more insights and advanced tips, consider exploring these resources:
- Choosing quality chocolate for cake pops to elevate the flavor of your creations.
- Professional pastry-making courses to enhance your baking skills and knowledge.
Embrace the joy of making cake pops and share your delightful creations with friends and family!