Introduction to Cake Pops
Cake pops delight dessert lovers worldwide with their bite-sized charm. These treats blend cake’s moistness with a lollipop’s convenience, offering both delicious taste and playful ease. But what are cake pops, and why have they become so popular?
What are Cake Pops?
Cake pops consist of small cake balls mixed with frosting and coated in chocolate or candy melts. They resemble lollipops, mounted on sticks. The cake pop’s core is a dense mix of cake crumbs and frosting, creating a rich flavor. For a step-by-step guide to making your own, check out the Making Cake Pops Guide.
A Brief History of Cake Pops
Bakerella (Angie Dudley) gets credit for popularizing cake pops in the early 2000s through her blog and book. Yet, the idea of cake balls existed before. Cake pops have become popular for their unique presentation and design versatility. They bring joy to both makers and eaters. For creative ideas and advanced techniques, explore Master Cake Pop Recipes & Decorating Tips.
Why Cake Pops Are Popular
Cake pops have soared in popularity due to their versatility and customizable nature. They fit any occasion, from birthdays to weddings. Their small size also allows for enjoying a sweet treat in moderation. Interested bakers can start with a basic recipe like the one in Butter Cake Recipe: Master Delicious Recipes & Expert Baking Tips to create delicious cake pop bases.
Anatomy of a Cake Pop
The Core: Cake Crumb Mixture
The foundation of any cake pop is its core, a flavorful and moist cake crumb mixture. This core starts with choosing the right ingredients for the cake base. Typically, this includes flour, sugar, eggs, butter, and baking powder, though variations abound depending on the desired flavor and texture.
Creating the cake base involves baking a standard cake, and then allowing it to cool before crumbling it into a fine texture. This process is crucial as it determines the consistency of the cake pop. The cake should be moist enough to bind together without becoming too dense or soggy.
Flavor variations for the cake core are endless. Vanilla and chocolate are popular choices, but one can also explore red velvet, lemon, carrot, or even more exotic flavors like matcha or lavender. The key is to pair the cake flavor with complementary frostings and coatings for a harmonious taste experience.
Binding Agent: Frosting or Icing
The binding agent is what transforms the crumbled cake into a malleable mixture that can be shaped into balls. Frosting or icing acts as the glue that holds the cake crumbs together. The most common type used is buttercream frosting, but cream cheese frosting, ganache, or even jam can serve as alternatives.
The proportion of frosting to cake is vital. Too much frosting can make the cake pops too sweet and gooey, while too little may not hold the crumbs together. Typically, a ratio of one-part frosting to three parts cake works well.
Alternative binding agents can include condensed milk, nut butter, or even marshmallow fluff, depending on the desired flavor profile and texture. These alternatives can add unique tastes and textures to the cake pops, offering a delightful twist to the traditional recipe.

Forming the Cake Pop
Shaping and Cooling
Once you have your cake crumb and frosting mixture ready, the next step is to shape this blend into the iconic cake pop balls. The technique for shaping cake pops is straightforward but requires a gentle touch. Using a small ice cream scoop or a spoon, portion out the mixture. Then, roll it between the palms of your hands to form smooth, even balls. Consistency in size is key for uniform cooking and presentation.
For those aiming for perfection or uniformity, weighing each portion can ensure that all cake pops are identical in size. Some bakers use silicone molds to shape their cake pops, which can be especially helpful when making them in unique shapes or designs.
Cooling and setting are crucial stages in the cake pop-making process. After shaping, the cake balls must chill in the refrigerator for at least an hour or until they are firm. This step ensures that they maintain their shape when you insert the stick and dip them into the coating. Skipping this step can result in cake pops that fall apart or are too soft to work with.
For an extra secure bond, some bakers dip the tip of the cake pop stick in a little bit of melted chocolate or candy melt before inserting it into the chilled cake ball. This method acts like glue, holding the cake ball securely on the stick. Once assembled, the cake pops should go back into the fridge to set completely, ensuring they are firm enough to handle the dipping and decorating stages that follow.
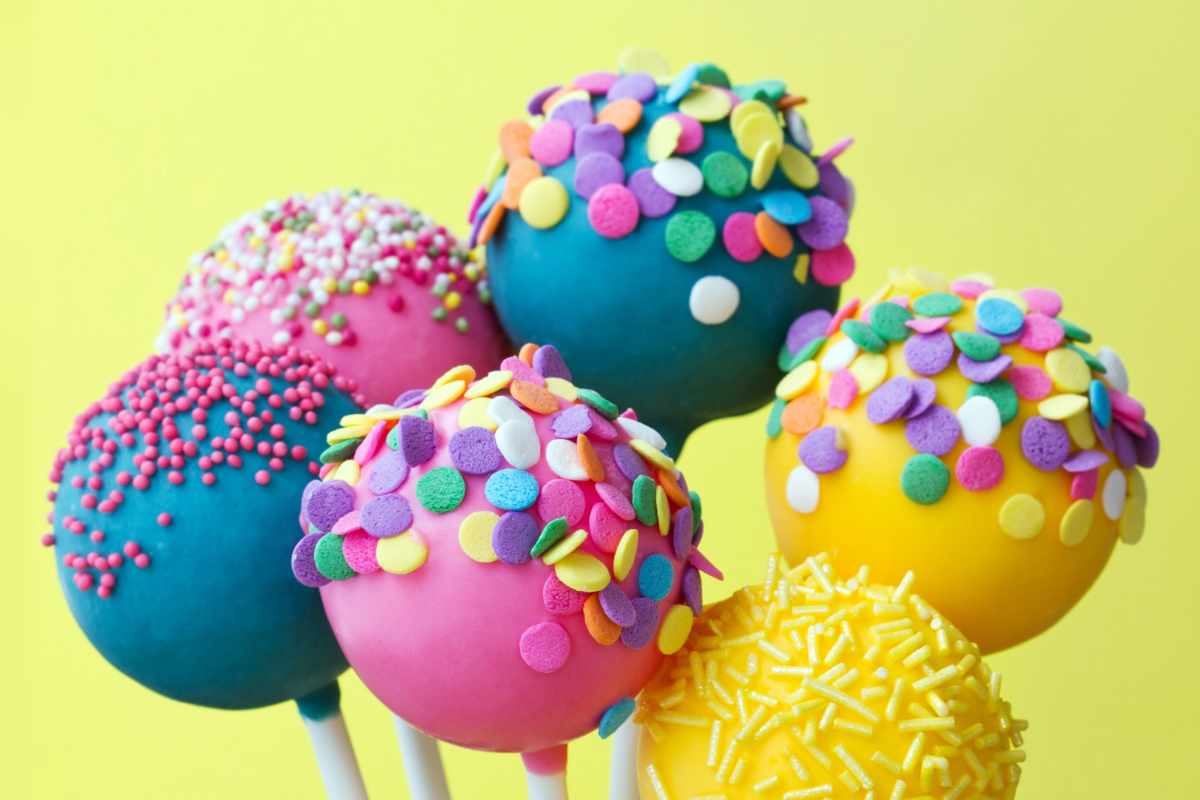
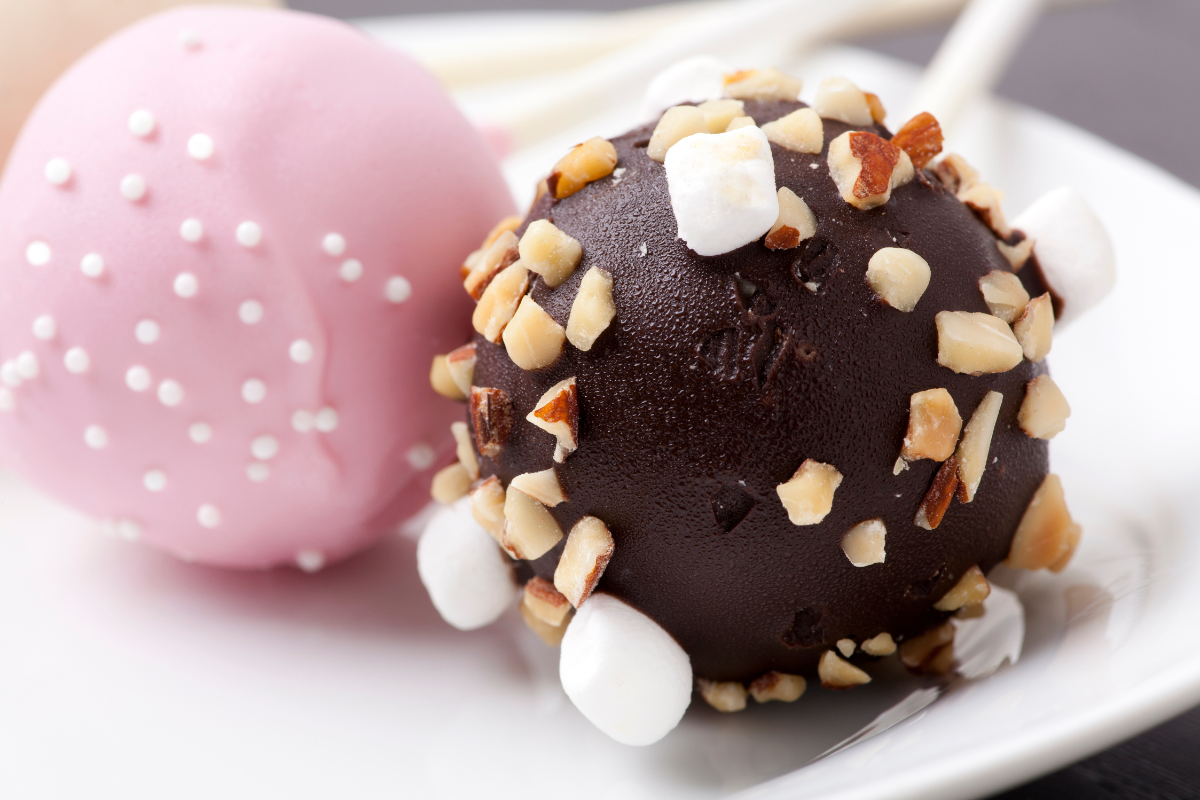
Coating and Decoration
The Outer Shell: Coating Choices
The outer shell of a cake pop not only adds to its visual appeal but also provides a delightful contrast in texture to the soft cake core. The two most popular choices for this coating are chocolate and candy melts, each offering its benefits.
Chocolate, whether dark, milk, or white, is a classic choice. It provides a rich, authentic flavor and can be tempered to achieve a smooth, glossy finish. Tempering chocolate involves carefully melting and cooling it to stabilize the cocoa butter, resulting in a coating that snaps when bitten into. If tempering sounds too complex, simply melting the chocolate gently in a double boiler or microwave can also work, though the finish might not be as crisp.
Candy melts, on the other hand, are easier to work with as they melt to a perfect consistency and don’t require tempering. They come in various colors, allowing for vibrant designs without the need for additional food coloring. However, some might find candy melts too sweet or miss the depth of flavor that real chocolate offers.
When dipping the cake pops, ensure the coating is smooth and at the right temperature – not too hot, as this can cause the cake to soften and potentially slide off the stick. Dip each cake pop straight into the coating, then gently tap off any excess to avoid drips. A foam block or a piece of styrofoam can serve as a handy stand to keep cake pops upright while they set.
Decorative Touches
Once coated, cake pops can be transformed into edible art with various decorative touches. Sprinkles, crushed nuts, or drizzles of contrasting chocolate can be applied while the coating is still wet. For themed events, cake pops can be decorated to match, using colored sugars, fondant accents, or even edible glitter.
For a professional finish, it’s all about the details. Ensure your decorations are applied neatly and symmetrically. Use tweezers for precise placement of small decorations. If you’re using additional piping to add details, practice your design on parchment paper before moving on to the cake pops.
Remember, the coating sets quickly, especially if the cake pops were chilled beforehand, so add any decorations immediately after dipping. Once fully set, these treats not only look impressive but also offer a multi-sensory delight, with contrasting textures and flavors coming together in each bite.

Serving and Storage
Innovative Presentation Ideas
Cake pops serve as a versatile and delightful dessert option, suitable for both casual and formal events. Arranging them in a bouquet style, where you insert the sticks into a decorated foam block or a pot with styrofoam, offers an attractive and interactive centerpiece. For a touch of elegance at more formal events, consider placing cake pops in clear bags tied with thematic ribbons, making them perfect for party favors. Displaying them on tiered stands can also create a captivating centerpiece for dessert tables.
Aligning with Event Themes
When planning your event, choose cake pop decorations and colors that complement the overall theme. For children’s parties, consider fun and whimsical designs, while weddings or more formal gatherings might call for sophisticated decorations like edible glitter or delicate floral accents.
Storage Essentials
To ensure cake pops remain fresh and delectable, proper storage is crucial. If not serving them immediately, store the cake pops in an airtight container in the refrigerator, where they can stay fresh for up to a week. To prevent any moisture from ruining their appearance or texture, allow them to reach room temperature before serving if they’ve been chilled.
Long-Term Storage Solutions
For extended storage, you can freeze cake pops. Wrap each one individually in plastic wrap and place them in a freezer-safe container. Thaw them in the refrigerator when you’re ready to serve. Although freezing can preserve them for several months, it’s best to enjoy cake pops fresh to ensure the best texture and flavor of the coating.
DIY Cake Pop Recipe
Step-by-Step Guide
Making cake pops at home can be a fun and rewarding DIY project. Here’s a detailed guide to help you create these delightful treats:
Ingredients:
- 1 box cake mix (any flavor) plus ingredients to make the cake (usually water, oil, and eggs)
- 1/2 cup frosting (any flavor)
- 400g chocolate or candy melts
- Sprinkles or decorations of your choice
- Cake pop sticks
Instructions:
- Bake the Cake: Prepare the cake according to the package instructions. After baking, allow the cake to cool completely. This can take a couple of hours, but the cake must be cool to the touch to prevent the frosting from melting when mixed.
- Crumble the Cake: Once cooled, crumble the cake into fine crumbs using your hands or a food processor. Ensure there are no large chunks to achieve a smooth texture for your cake pops.
- Mix in Frosting: Add the frosting to the crumbled cake, starting with a small amount and gradually adding more until the mixture is moist and can hold a ball shape. Be careful not to add too much frosting, as this can make the cake pops too sweet and gooey.
- Shape the Cake Pops: Roll the mixture into balls, ensuring they are compact and smooth. If the mixture is too sticky, refrigerate it for a bit to firm up. This will make the rolling process easier.
- Chill the Cake Balls: Place the shaped balls on a baking sheet lined with parchment paper and refrigerate for at least an hour to firm up.
- Prepare the Coating: Melt the chocolate or candy melts in a microwave-safe bowl, stirring every 30 seconds to prevent burning.
- Dip and Decorate: Dip the tip of each cake pop stick into the melted coating, then insert it into a cake ball. Dip the cake pop into the coating, ensuring it’s completely covered. Tap off any excess coating, then decorate with sprinkles or other decorations while the coating is still wet.
- Set the Cake Pops: Stick the cake pops into a piece of styrofoam or a cake pop stand to let them set completely, usually about an hour.
Tips for First-Timers:
- Be patient and give yourself plenty of time for each step, especially if you’re new to making cake pops.
- If the cake balls start to fall off the sticks, they might be too heavy or not chilled enough. Make sure they’re firm before dipping.
- Use a deep, narrow cup for the melted chocolate or candy melts to ensure the cake pops can be fully submerged for an even coat.
- If the coating is too thick, add a bit of coconut oil or vegetable shortening to thin it out for easier dipping.
FAQs
1. Preventing Cake Pops from Falling Off the Stick
Cake pops may fall off the stick if they’re too big, too moist, or not chilled enough. To avoid this, make smaller, denser balls and chill them well before dipping.
2. Enhancing Cake Pop Flavors
Boost flavors by picking complementary cake and frosting types. Add extracts, zests, or liqueurs to the mix, and choose quality chocolate or flavored melts for coating.
3. Melting Chocolate the Right Way
For quick melting, use a microwave with short bursts and stir in between. Or, melt chocolate over a double boiler, keeping water away from the chocolate.
4. Making Cake Pops in Advance
You can prepare cake pops a few days ahead. Store them in the fridge in an airtight container and let them warm up a bit before serving.
5. Avoiding Cracked Coatings
To prevent cracks, don’t dip cold cake pops in too hot a coating. Let them warm up slightly, and ensure the chocolate is not overheated. Tempering chocolate can also prevent cracks.
Conclusion
Making cake pops is a fun and artistic activity that suits any event. Both beginners and seasoned bakers can enjoy crafting these treats and experimenting with various flavors and designs. Follow the provided guide and tips to create impressive cake pops. Practice and experimentation are key to perfecting your cake pop skills.
External Links for Expanded Learning:
- Easy Cake Pop Recipe – Fresh April Flours: A beginner-friendly guide with additional insights and variations.
- Homemade Cake Pops – Sally’s Baking Addiction: Offers in-depth instructions and expert tips for more advanced cake pop creations.